In this tutorial, we'll show you how to integrate UtilityAPI's authorization process into your web and mobile applications. Your customers will be able to authorize data sharing seamlessly within your application for a easy, fast, "in-the-moment" experience.
As always, if you hit any snags or have any questions, don't hesitate to contact customer support. If it ends up that you aren't allowed to embed UtilityAPI's authorization form into your website or app, no worries! You can always manually request customer authorizations via our dashboard interface.
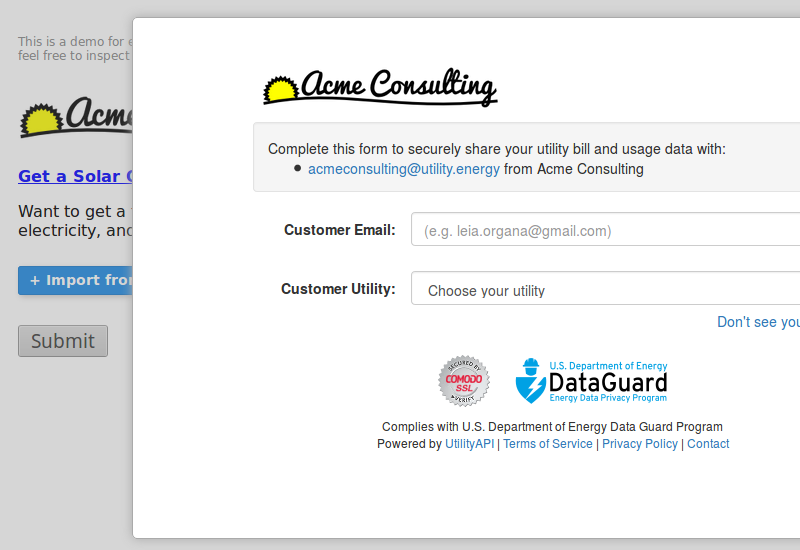
What embeddding the UtilityAPI authorization form looks like (see demo).
For each user, we automatically generate a link (called a "URL") that you can send to customers when requesting their utility data. This URL can also be embedded into websites and apps so that customers can authorize utility data sharing directly in your website or app. You can find your default authorization form base URL by going to your Settings, looking under the Data Request Settings section, and finding the "Base URL" field.
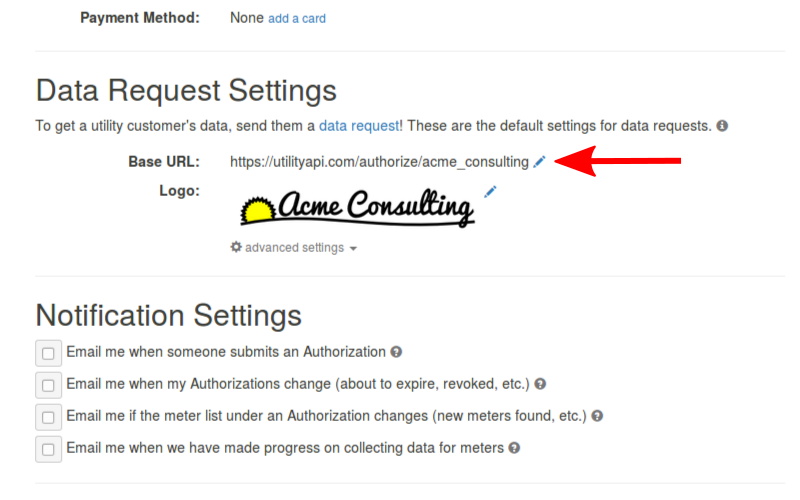
The "Base URL" in your settings.
When a customer is finished with our authorization process, we want
to send them back to your website or app so they can continue with
your user experience. To accomplish this, we need you to set a URL
where we can redirect the user after they are done authorizing. This
redirect should be somewhere on your website that will know how
to handle the redirect parameters we provide in Step 4. You can set
your redirect in
            Settings
            >
            Data Request Settings
            > Advanced Settings > Redirect
.

Where to set a redirect in your settings.
Now that you have your authorization form base URL setup with a redirect,
you're ready to embed the authorization form! To do this, you need to add an
<iframe> to your website. <iframe> tags
are pieces of html code that let you embed other websites into your website.
Simply copy the authorization form base URL that you found from Step 1
and put it as the source in an iframe src attribute. Below is an example
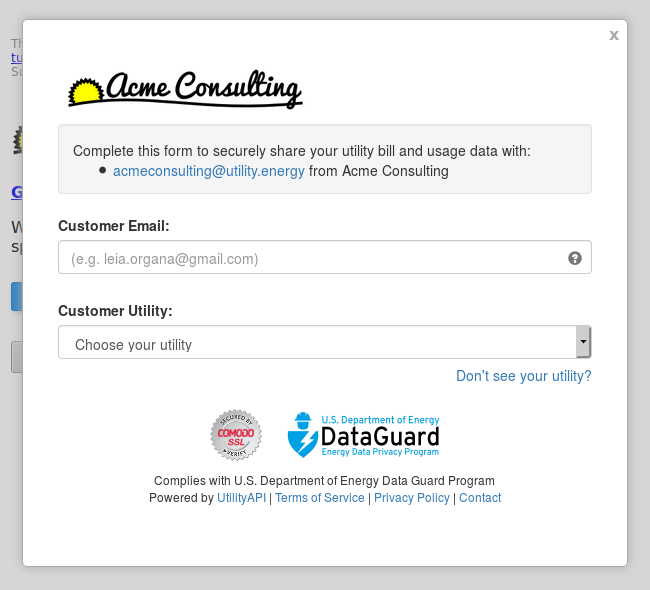
iframe html snippet and what the embedded authorization form looks like to the customer.
<iframe
    src="https://utilityapi.com/authorize/demo_here"
    style="height: 800px; width: 800px;"></iframe>
When a customer is done authorizing, we create a
referral
and add it as a parameter when redirecting the user back to you. You can
use this referral to look up the authorizations that we created by the
customer during the authorization process. The webpage you set as your redirect
URL should be able to extract this referral from the url parameters.
If you want to keep things simple, you can just save this referral for later so you can manually lookup what what authorized on your UtilityAPI dashboard (see Step 4a).
If you want to build in more automation, you can use this referral to start a job on your servers that automatically fetches the meters and collects historical bills and intervals (see Step 4b).
NOTE: If you're using an iframe, the referral redirect happens
inside the iframe, so if you want to send the referral the parent window where
the iframe is embedded, you need to use javascript's
window.parent.postMessage().
In our live demo,
you can see us using this technique to auto-close the iframe when we get back a referral.
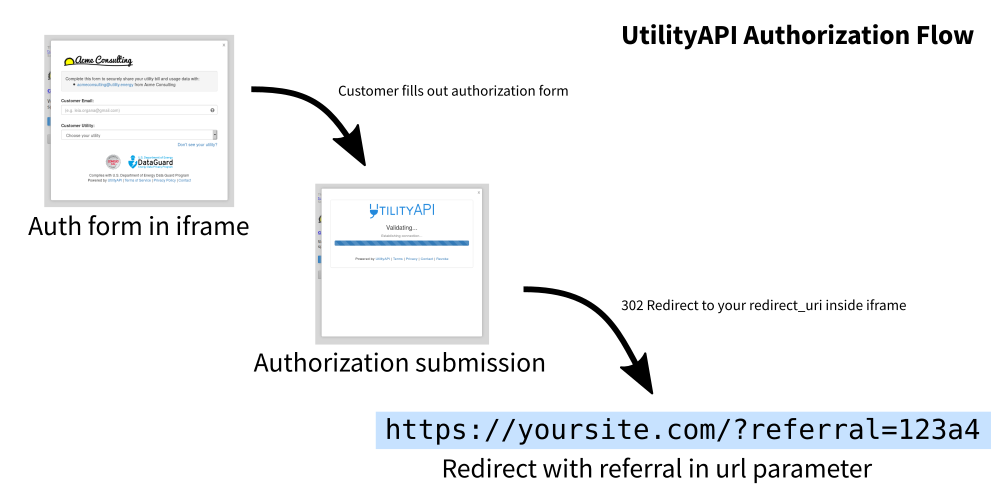
A simple flow diagram showing our authorization flow.
If you've saved a referral code from a customer's authorization, you can
lookup the authorizations that were submitted for that referral on your
UtilityAPI dashboard. Simply
put the referral code you saved in a ?referral=... url parameter
in the dashboard URL.
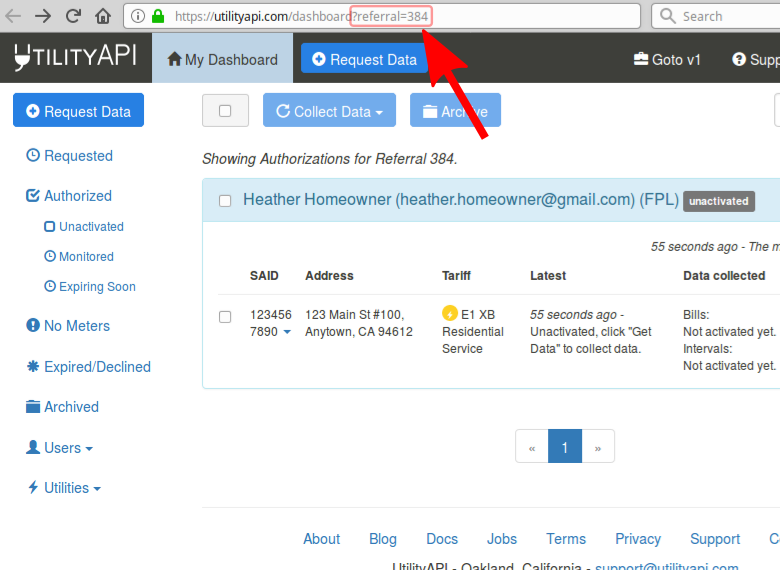
Example looking up authorizations using a referral in your dashboard.
If you want to automate the process of collecting the utility data, you
can start that process by looking up the authorization and meters on our
API. Simply query the
/api/v2/authorizations
endpoint with a
?referrals=...
parameter and we'll return the authorizations that were part of that referral.
To learn more about how to see the meters and collect historical utility data
via API, see our Quickstart.
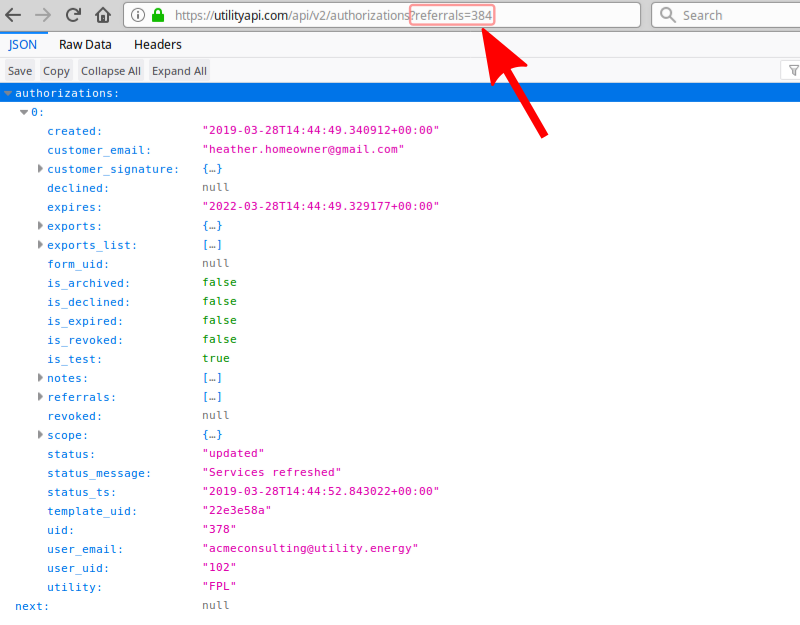
Example looking up authorizations using a referral in the API.
Congrats! You've just embedded the UtilityAPI authorization form! You can
test out how well it works by using one of our
Test Scenario
logins (e.g.
"UAPI_TEST_residential"
as the username). You can use these test scenarios to see how well your
referral handling works for various situations.
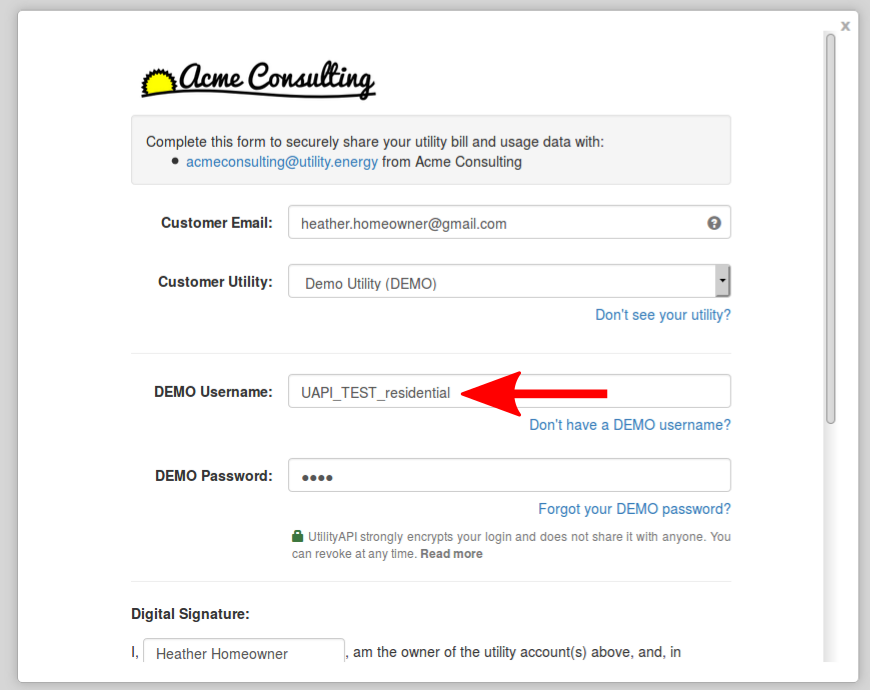
Testing out a test scenario in your embedded authorization form.
This tutorial shows how to embed a basic authorization form into a website or app. However, we also offer many additional advanced features that will let you customize your integration like a pro! Here's a rundown of advanced functionality we have built into our authorization process:
